Sync GitOps applications
Sync is a process that ensures that the live state of a system matches its desired state by applying a declarative description. This process involves synchronizing the desired Git state with the live cluster state.
To sync applications from the Applications page:
-
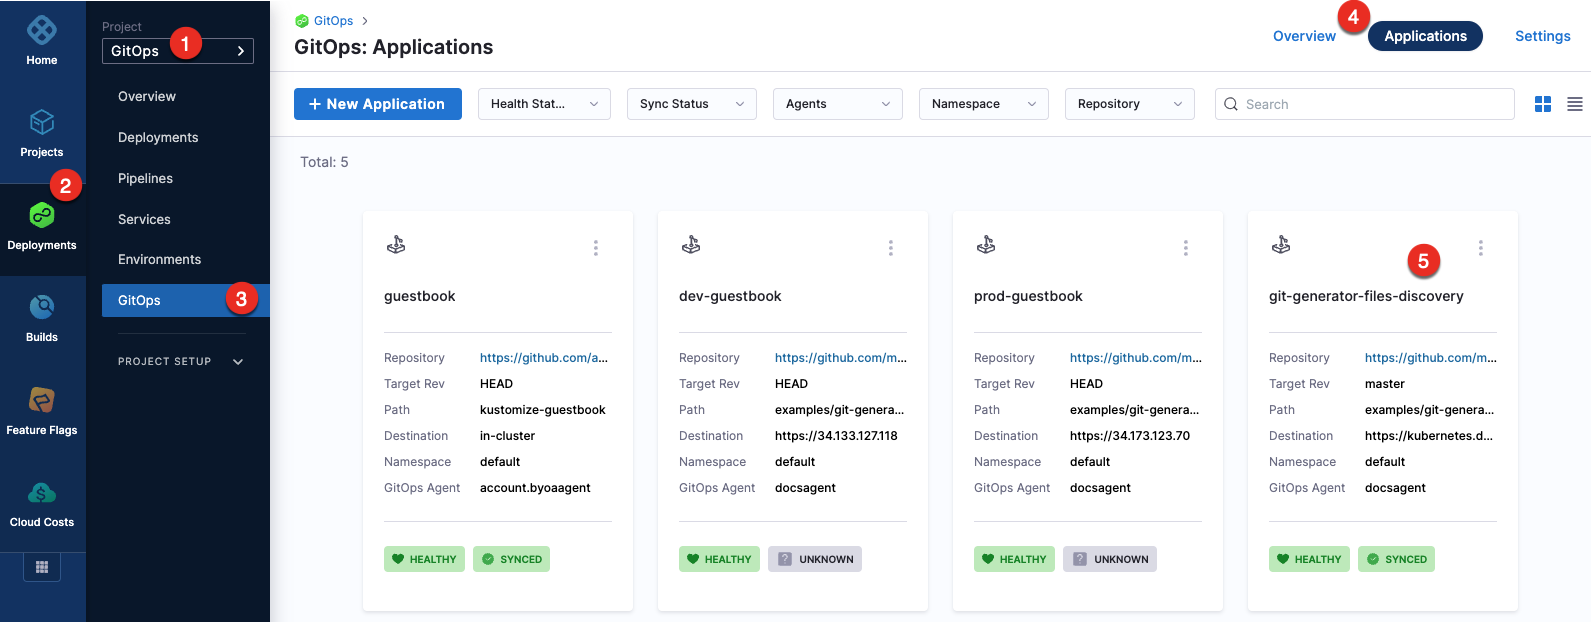
In your GitOps project, go to Deployments > GitOps > Applications, and then select your application.
-
To sync the selected application:
-
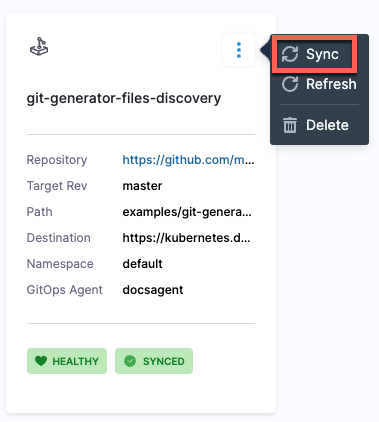
Select the more options icon, and then select Sync.
-
Select the application, and then select SYNC.

-
-
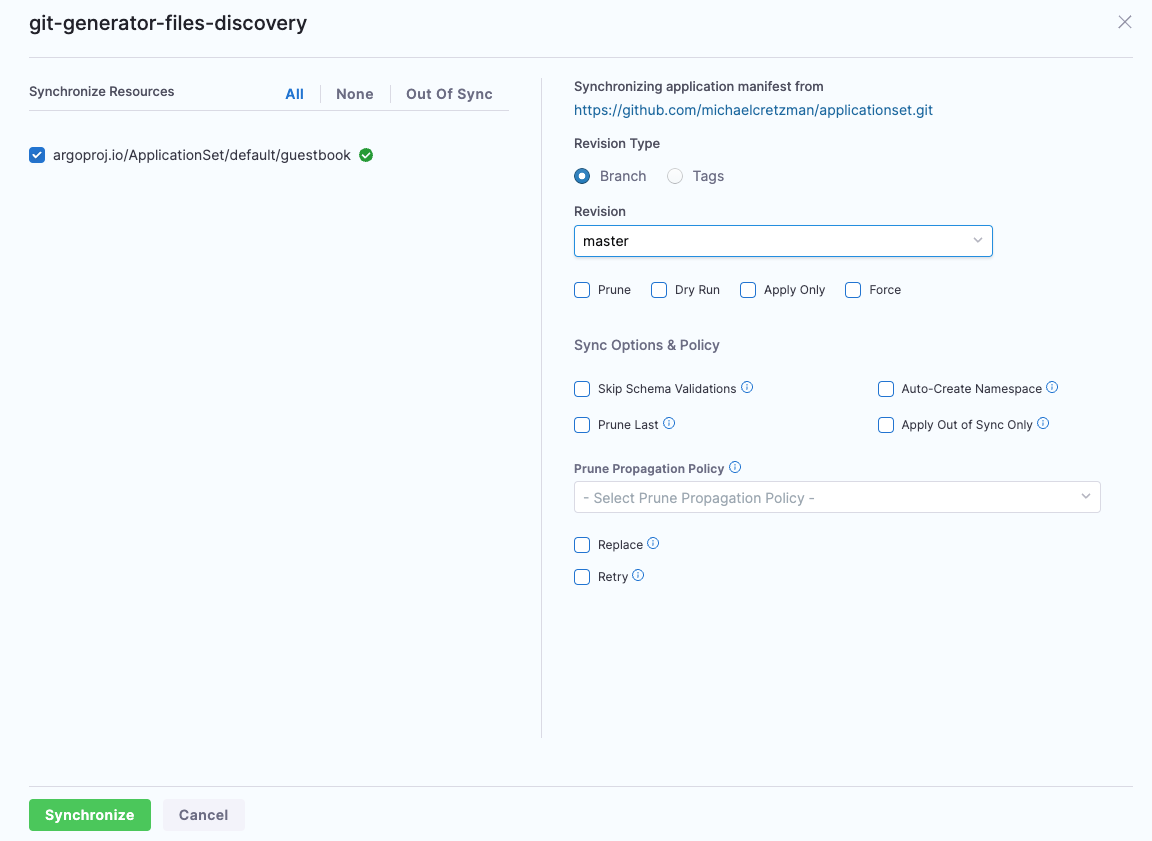
Configure the sync options, and then select Synchronize.
When synchronizing the application, you have the option to apply a specific revision. By default, target revision of the application is selected.
The Branch and Tag options display a list of available branches and tags, allowing you to make a selection. Additionally, the Ref option enables synchronization of branches, tags, and commit hashes.
To sync applications using the GitOpsSync step:
-
Select a pipeline and go to the Execution tab of a deploy stage.
infoMake sure that the service, environment, and cluster selected in the pipeline matches the service, environment, and cluster in the application.
-
Select Add Step, and then select the GitOpsSync step.
-
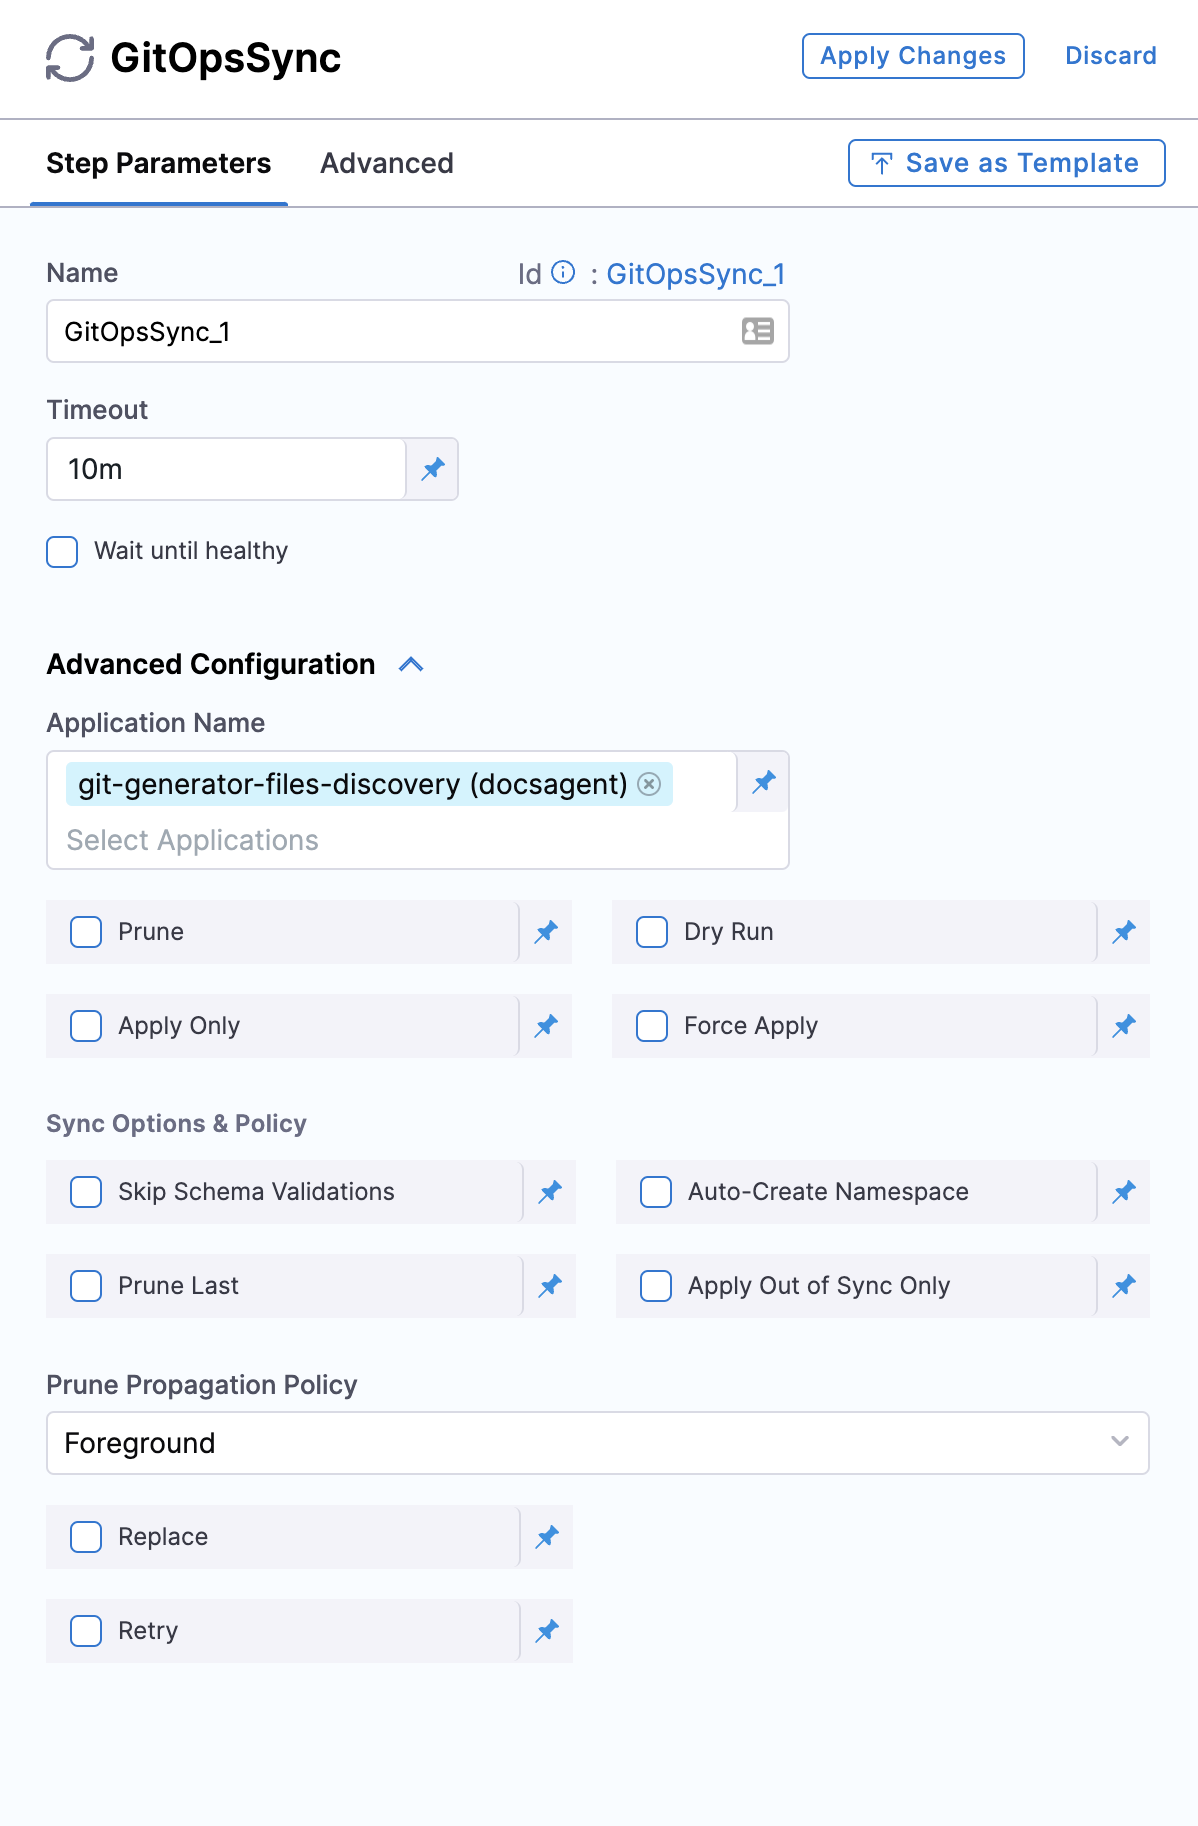
Select the GitOpsSync step to configure step parameters.
-
Optionally, click on the Wait until healthy checkbox, if you would like the step to run until the application reaches it's Healthy state.
-
In Advanced Configuration, select the application you want to sync and configure the sync options.
-
Select Apply Changes.
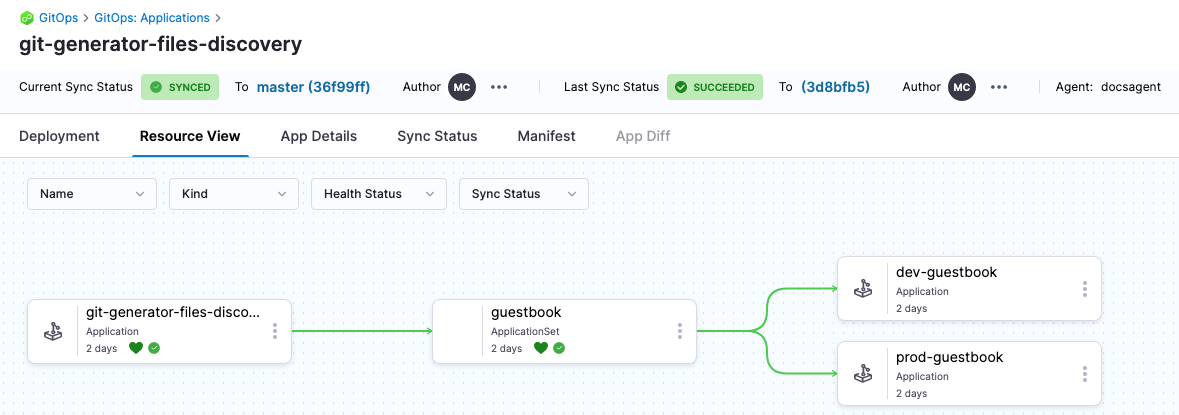
Here is how the resources would look in Harness after the sync process is complete.
